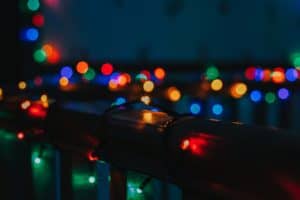
Everyone loves the warm glow of Christmas lights in the dark months of the year. However, setting them up correctly can be a daunting task if you don’t approach it with a plan. To make things easier, we’re sharing some tips for setting up your yuletide display for success.
Plan your design and make your budget
When you are starting a project like this, it’s an excellent first step to establish a budget. You want to make sure that your joyous display is something that’s going to continue to spark joy, not something that you finished over your estimate. Going in, knowing your number is going to make sure that you’re happy with your result.
As you’re looking around your property, you’re going to want to know how much a given area will need. A good rule of thumb is that you’ll need 100 lights for every 1.5 feet of tree or shrub that you’re hanging, and you can use a similar figure for covering 1.5 square feet of roof or siding. This will help you get your head around how much design you have to play within your budget.
Where are you going to place your lights?

When you’re placing your Christmas lights, you want to start by establishing a few features of your house or property that are going to be focal points of your design. Many houses are asymmetrical or weighted more heavily on one side or the other, which is frequently offset by the architect with architectural or landscape features, but the asymmetry may look awkward if you just light up everything.
Good places for focal points tend to be windows, large trees, door frames, pillars, posts, and the eaves but try to pick only one or two to focus around and leave the other areas less fully populated to emphasize the places where you’ve put in the work. Window boxes and planters that you already have are also usually instinctively placed around these areas and can be lit up to accent the features they’re near. If you’re hanging and you feel like something’s off-balance, don’t be afraid to subtract lights from the side that feels too heavy. Taking away something is free, but adding more things can be a lot of work while only making the problem worse.
Carefully choose the lights you plan to hang
Your power supply and the type of lights you choose can also determine how much lighting you can afford in your design. For example, a lot of people favor incandescent bulbs for their warm glow. However, these lights tend to overheat if left on for an extended time, and you are only likely to be able to attach three to six light strands per outlet, which means that you have to be more strategic in your placement and more attentive to when you turn them off.
If you are looking to be more ambitious with your lighting designs, it’s likely that you’ll want to go with LED string lights, which can fit up to 25 strands per outlet on most standard circuits. They also don’t overheat as much and are much more energy efficient. However, regardless of which type you choose, you want to make sure to buy all your lights in a single type or color at a time as year-to-year variations in manufacture can lead to mismatched lights, which will make your display less peaceful.
For expanding beyond your initial wiring system, there are weatherproof battery-powered light packs of both varieties. However, these need frequent maintenance, and you’ll want to make sure you have backup rechargeable batteries on hand to keep those lights running night in and night out. Otherwise, a significant portion of your carefully plotted design could go down.
Numerous lighting styles are available
For different effects, you may want to pick different sizes of lights. The largest lights are C9 Christmas lights (1¼ inches diameter and 2½ inches tall), while smaller ones are available down to C7 (¾ inch diameter and 1⅛ inches tall). Of course, a bigger light will provide brighter output and fill more space, so plan for the size of your light as you’re considering applications.
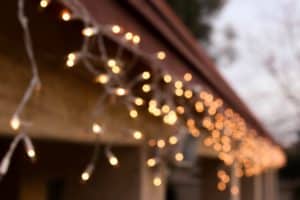
For roof lines, overhangs, and peaks, there are some styles that you might consider as an accent instead of a simple outline. For example, icicle and raindrop lights hang down in chains from a single line that attaches to the gutter or the drip edge and give a nice cascade effect in these areas.
It’s also worth considering whether you want to have twinkling or stationary lights. With programmable lights, the motion of light displays can get quite intricate. However, some people find these effects to be overwhelming. So be judicious about using them and consider exactly how much of your house or tree you want to be dancing. Done right, it can be lovely, while done wrong, it can be a bit much.
Don’t forget to gather all the tools you’ll need
Once you’ve got your design in place, you want to double check that you have the appropriate tools for the job. One of the first things you need to check is that all of your extension cords and lights are UL rated for outdoor use. If a light display isn’t safe, it will not be very effective at bringing peace and joy.
You’re also going to be working upon an elevated surface, so in addition to making sure that your extension ladder is in good repair, you’re also going to want to invest in a tool belt or over-the-shoulder bag. This ensures that your hands can remain free while climbing. You’ll also want your sturdiest and best traction shoes to make sure you stay ON the roof.
In your kit, you should avoid nails or staples whenever possible at all, instead of opting for plastic clips. There are a few different kinds of plastic clips which attach to the edge of shingles without going under or to the dripline or gutter. Some of these clips combine simple hooks or latching hooks, and there are specific roof peak clips that attach to the side of the shingle while sitting on top of it. These will make removal easy come spring and prevent you from punching holes in the roof. Clips are generally sized to go with the size of your bulbs, so make sure you know whether you’re using C7 or C9 clips.
For vertical spaces like windows, columns, or the side of your house, there are adhesive clips that stick to the surface and allow you to hang lights vertically up the side of the building. These are great as for many applications. You can put them up without even getting on a ladder, and they let you adorn otherwise unavailable spaces.
Last, it’s very smart to invest in app-controlled smart plugs or timer plugs that will save on your electricity bill and prevent you from leaving them on. If you’re using a smart plug, make sure your internet is secured, as you don’t want to find out if you have a mischief-maker in the neighborhood.
Check roof condition and the weather forecast
When you’re ready to head up there, the first thing you absolutely need to check is what the weather is going to be. You should never work on a roof when it’s wet or uncleared, and you should plan to be up there for a few good hours, so check the weather report and look around at the clouds.
Get someone to help you
You have to have someone with you to hold your extension ladder as you head up after you’ve secured and leveled it. People hurt themselves every year by not asking someone to just do this one small thing, but you don’t have to be one of them.
Line up your lights
Untangle your lights on the ground, not up on the roof, and take the time to inspect and test each line. You’re going to be much better equipped to fix any problems with the lines and detect any fraying, loose bulbs, or damage when you’re not also trying to stay up on the roof. Once they’re untangled, carefully coil and pack them so that they come out of the bag or off the shoulder cleanly.
Clips need to go on first
As most people are rarely on their roof, you want to take the time to set up your clips first and make sure that you’re setting the shingles back correctly with no gaps underneath. Then, after that’s all set, you can return to string the lights knowing that you did the first job correctly.
Now that you have your lights all fixed up, you can enjoy their glow all season long, knowing that you’ve set yourself up for success and that come spring packing the kit away won’t be a huge problem. Of course, it’s also worth taking time to inspect your lines when they come down and to stow them away as untangled as you can get them.
The post How to Hang Christmas Lights Correctly appeared first on Mr Roof.